

If your test suite already speaks Gherkin, catching visual regressions no longer means reaching for a separate tool with its own syntax and setup. The new @webship-js/diffy-steps package plugs directly into Webship JS 2.0.x and lets you drive Diffy's visual-testing platform from the same feature files you're already writing.
What it actually does
Under the hood, the plugin uses Playwright to grab full-page screenshots at whatever screen widths you care about, then pushes them straight into the Diffy REST API. From there, it can bundle screenshots into named snapshots, ask Diffy to capture pages remotely from a live environment, kick off comparisons between two snapshots (or two environments), and sit and wait until a comparison finishes running. The output is the same pixel-level diff report you'd get from using Diffy directly; the difference is that every step of getting there is a line of plain English in your .feature file.
Setting it up
Two packages, one install:
npm install --save-dev webship-js @webship-js/diffy-stepsFrom there, point your cucumber.js at both sets of step definitions, the core Webship-js steps and the new Diffy ones, alongside any custom steps of your own. Your Diffy credentials and defaults (API key, project ID, which breakpoints to test) live under worldParameters.diffy, though, as covered below, environment variables can override any of them at runtime.
How a test is structured
Every Diffy scenario tends to follow the same shape, whether it's simple or elaborate: capture something, upload that batch to Diffy under a name, then compare two uploaded batches and wait for Diffy to finish crunching the diff.
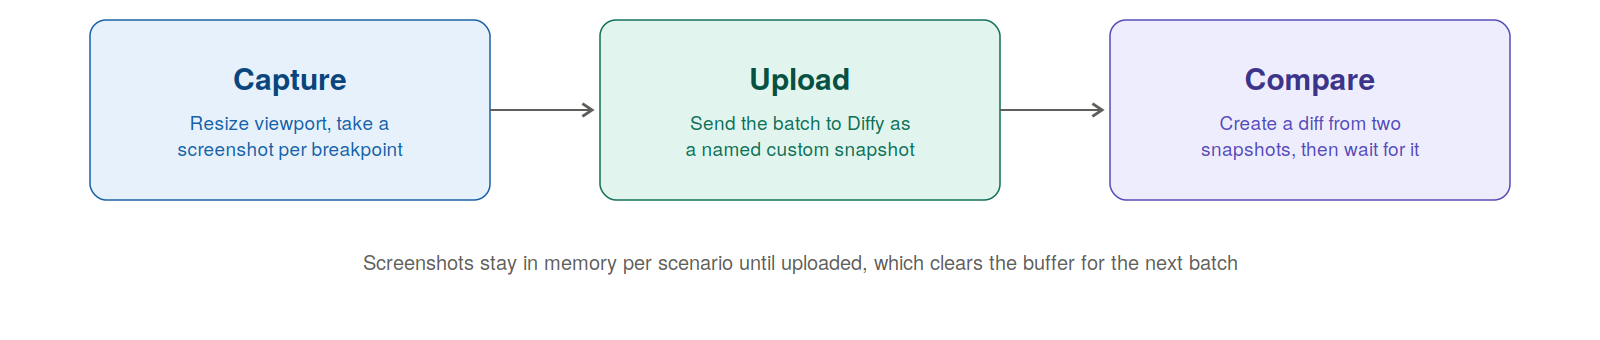
That's it. A baseline set, a "changed" set, and a comparison step in between is the whole pattern.
The step vocabulary
Rather than memorizing an API, you're working with steps that read like instructions:
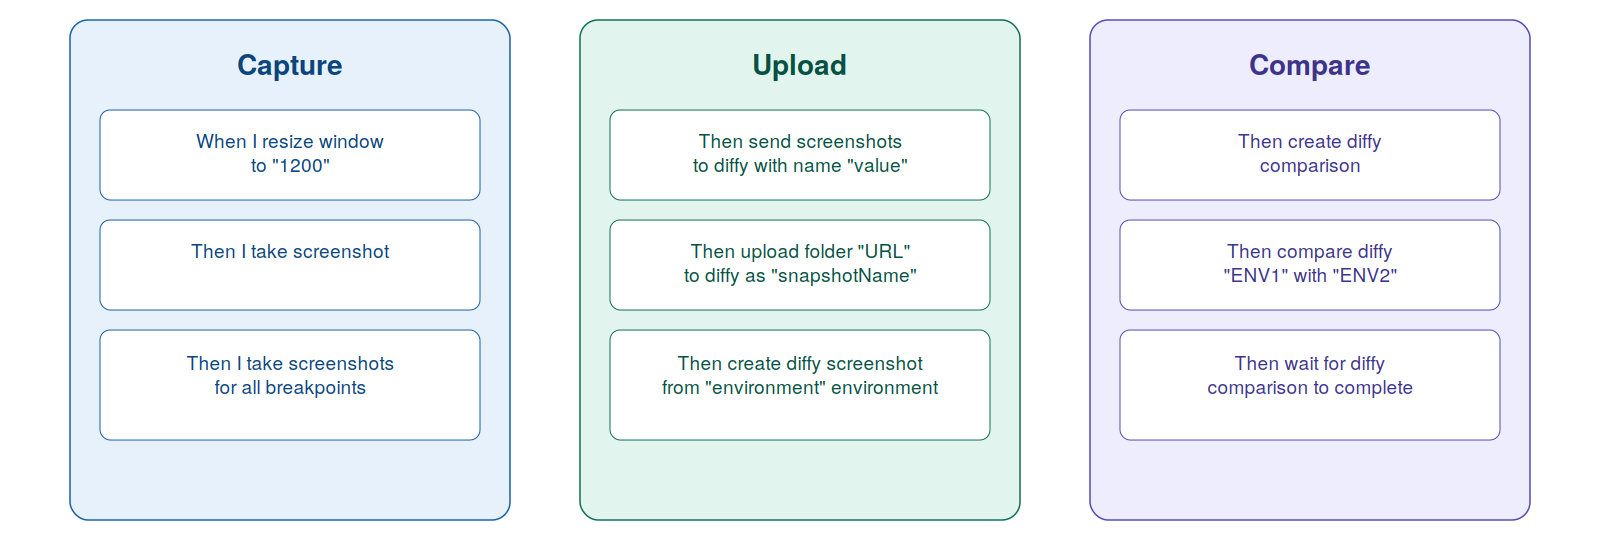
A few details worth knowing if you're troubleshooting: resizing pads the width slightly to account for Diffy's own window chrome, so the breakpoint numbers still line up correctly on Diffy's side. And several of the step definitions are written loosely enough to accept "I," "we," or no pronoun at all, a small thing, but it means less friction when different people on a team phrase scenarios differently.
A full scenario, start to finish
Feature: Diffy - visual regression

  @diffy @smoke
  Scenario: Resize, take screenshot, breakpoints loop, send
    Given I am on "/diffy/baseline.html"
    When I resize window to "640"
    Then I take screenshot
    Given I am on "/diffy/changed.html"
    Then I take screenshots for all breakpoints
    Then send screenshots to diffy with name "smoke-set-1"

    Given I am on "/diffy/baseline.html"
    Then I take screenshots for all breakpoints
    Then send screenshots to diffy with name "smoke-set-2"

    Then create diffy comparison
    Then wait for diffy comparison to complete
Two pages, two snapshot batches, one comparison, no image-diffing library to configure by hand.
Beyond local screenshots
The plugin isn't limited to screenshots taken in your own test run. Diffy can capture pages itself, straight from an environment already configured on your project — no local browser involved:
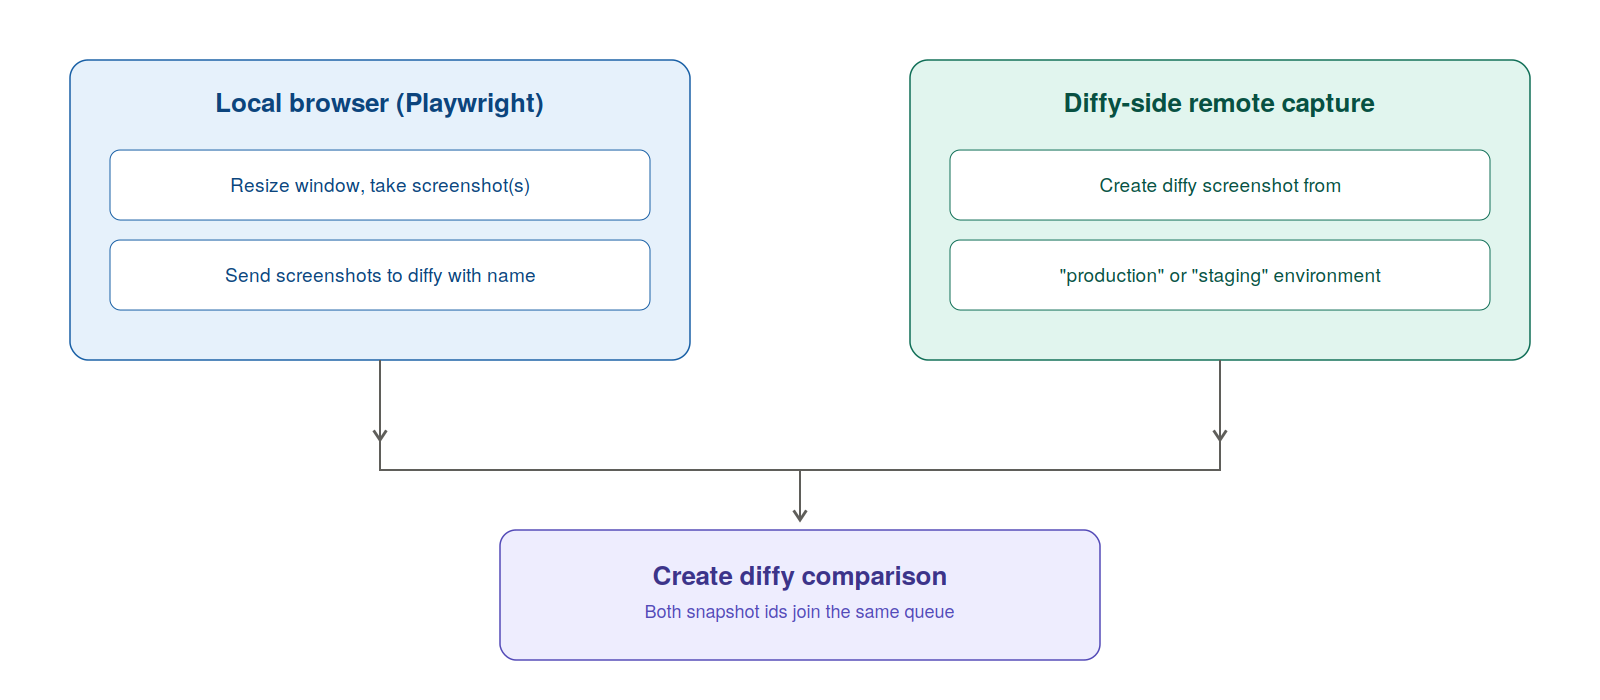
A few steps worth calling out:
Then create diffy screenshot from "production" environment, asks Diffy to capture a snapshot remotely from an environment configured on your project.Then compare diffy "prod" with "stage", kicks off a fully server-side comparison between two environments in a single step.Then upload folder "./screenshots/baseline" to diffy as "baseline", batch-uploads existing screenshots from disk, handy for importing shots produced by another tool or a previous run.
That last one is particularly useful if you're migrating from another visual-testing setup and already have a library of baseline images sitting around.
Configuration that fits into CI without extra work
Nothing about this setup forces you to hardcode secrets into cucumber.js. Every option, API key, project ID, breakpoints, timeout, and so on, can be set as an environment variable, which always wins over whatever's in worldParameters.diffy, which in turn falls back to a sensible built-in default.
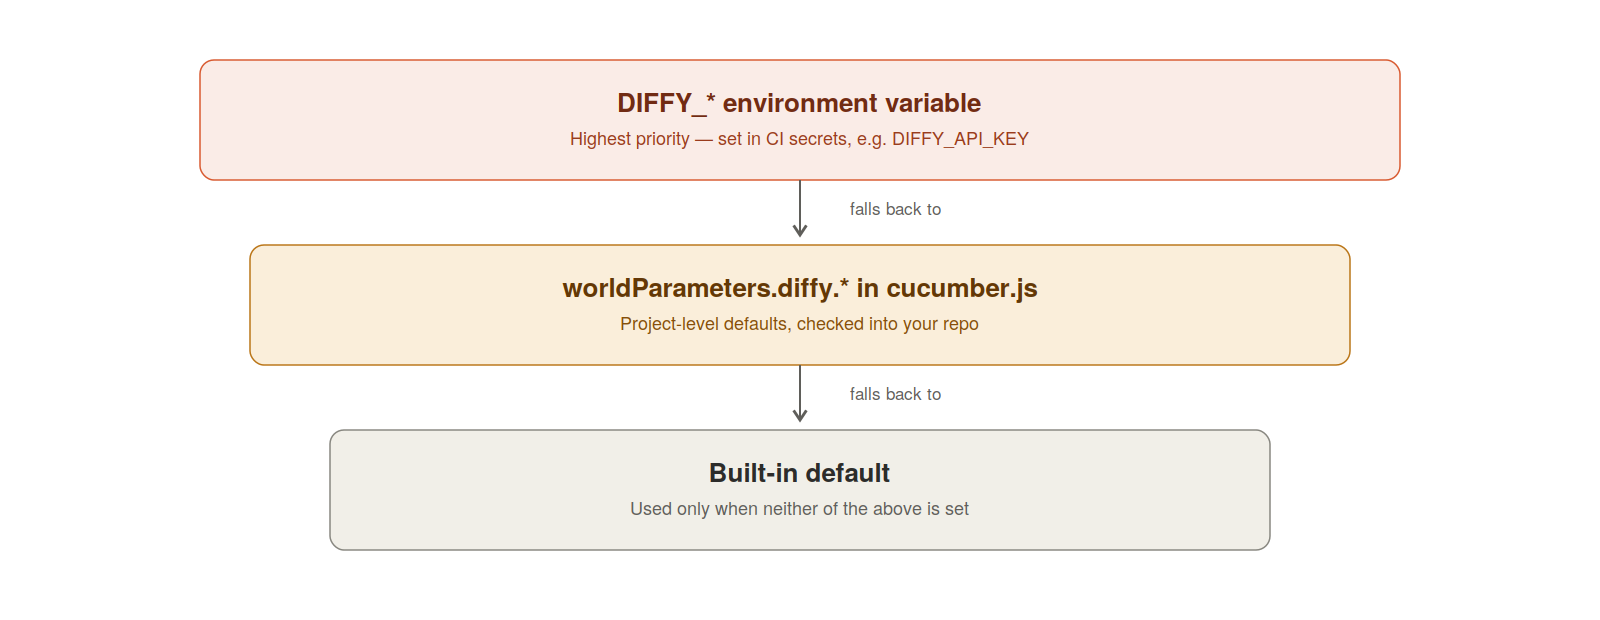
In practice, that means your local config file can hold reasonable defaults while CI overrides just the sensitive bits (DIFFY_API_KEY, DIFFY_PROJECT_ID) through secrets.
You'll need a Diffy API key to get started, which you can generate from your Diffy account's keys page. It's also worth tagging visual scenarios distinctly (@diffy is the convention used in the docs) so they can be run as their own suite, separate from functional tests; visual comparisons tend to take longer and don't always need to block every commit.
Why it's worth adopting
The real value here isn't the individual steps; it's that visual regression testing stops being a separate discipline with its own tooling and becomes just another part of the Cucumber suite your team already maintains. One install, a couple of lines in cucumber.js, and visual coverage is written the same way as everything else: in Gherkin, readable by anyone on the team, and running in the same CI pipeline.