
In modern web development, excellence isn’t measured by the sheer volume of automated tests you run; it’s about strategic execution. Indiscriminately testing every minor element can lead to "bottlenecks," slowing down your deployment cycle and frustrating your team.
By prioritizing your test suite, you catch critical failures early, ensuring a seamless user experience before a single bug reaches production.
Why Test Prioritization is Non-Negotiable
Running a full suite for every minor code change is inefficient. A prioritized approach allows you to:
Identify Showstoppers Early: Catch high-impact bugs before they escalate.
Accelerate Release Cycles: Ship features faster by reducing feedback loops.
Enhance Deployment Confidence: Ensure that core business logic remains intact with every update.
Optimize Resource Allocation: Save time and infrastructure costs by running the right tests at the right time.
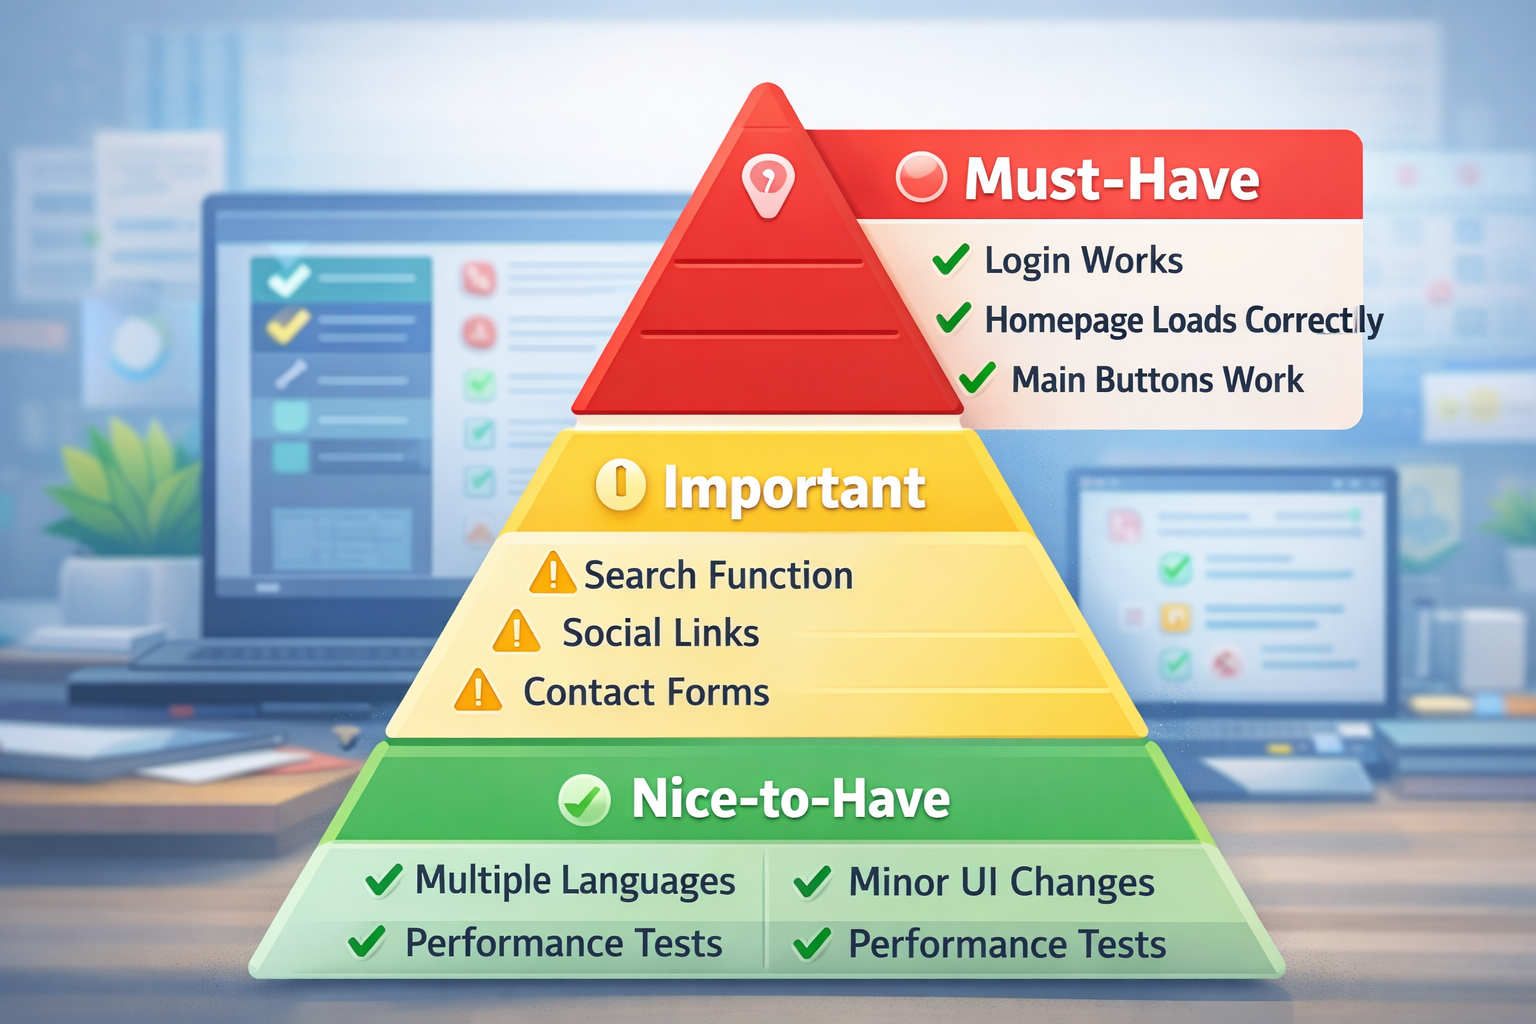
1. Categorizing Tests by "User Impact."
The most effective way to organize your workflow is to divide tests into three distinct tiers based on their criticality:
🔴 Tier 1: Critical Path (The "Must-Haves")
These are the deal-breakers. If these fail, your website is effectively broken for the user.
Authentication Flow: Can users log in and sign up?
Core Landing Pages: Does the homepage render correctly?
Primary Conversions: Do the "Add to Cart" or "Submit" buttons actually function?
Action: Run these first and most frequently. They are your first line of defense.
🟡 Tier 2: Functional Integrity (The "Important")
These features are essential for a good experience but won't necessarily take the site down if they stumble.
Search Functionality: Can users find what they are looking for?
Integration Points: Do social media links and contact forms work?
Navigation: Are the menus and breadcrumbs routing correctly?
🟢 Tier 3: Supplemental Checks (The "Nice-to-Have")
These are lower-priority items that can be validated less frequently or during off-peak hours.
Localization: Checking multiple languages or currency displays.
UI Polish: Minor visual regressions or layout shifts on secondary pages.
Edge Cases: Testing scenarios that only a small fraction of users encounter.
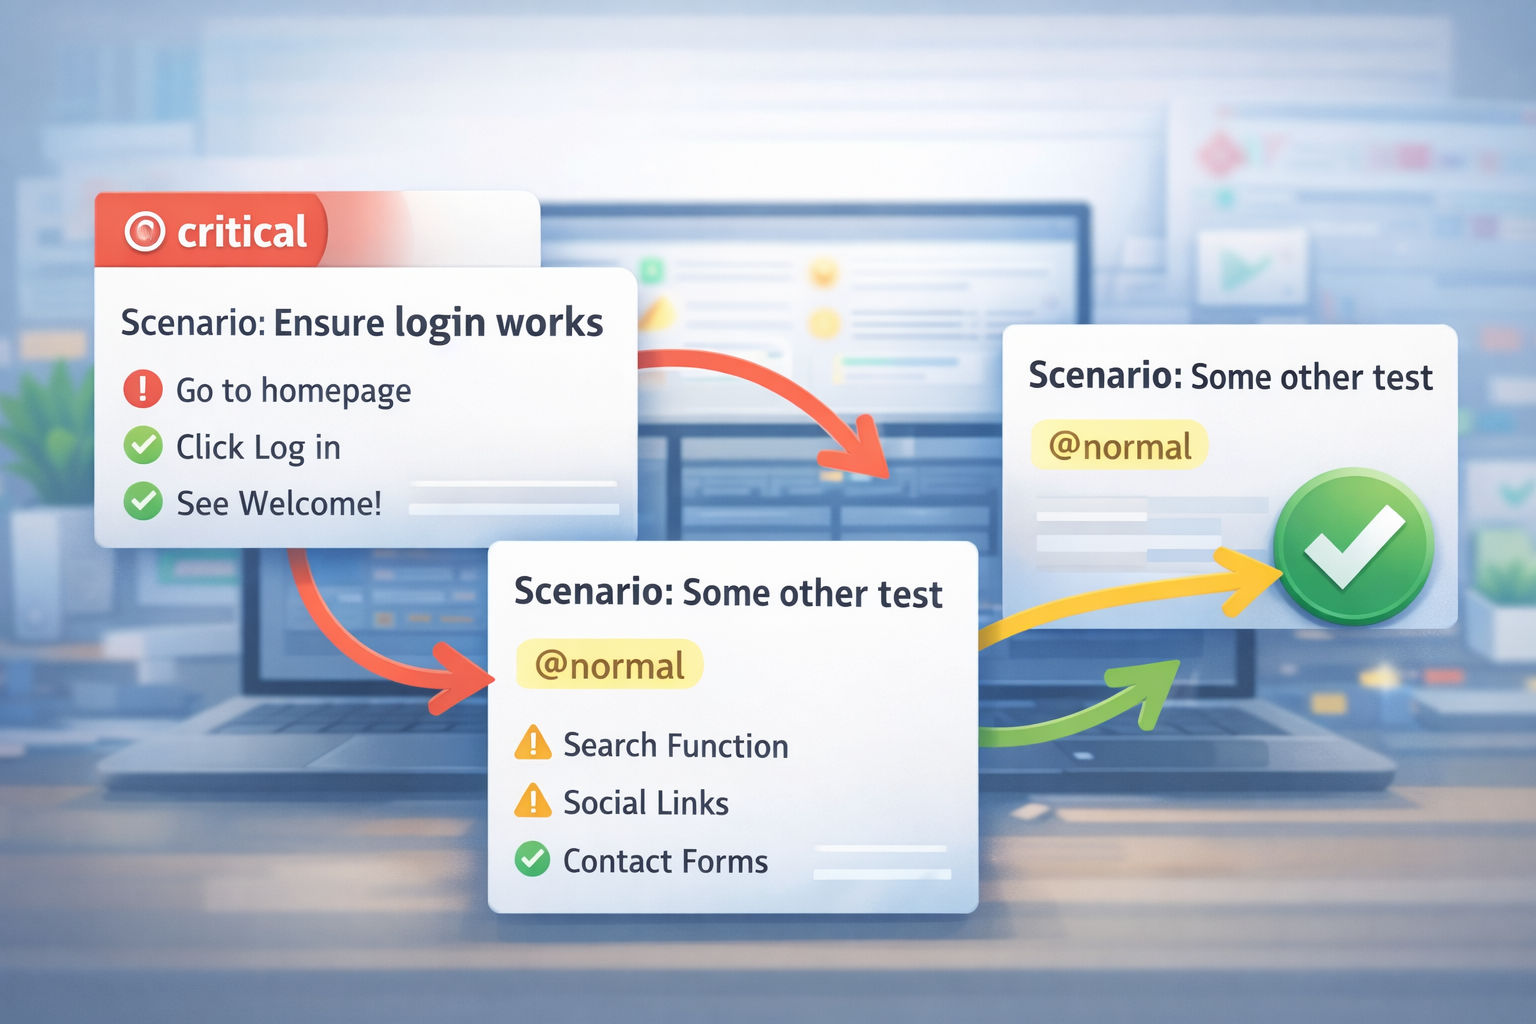
2. Leverage Tagging for Efficiency
Don't treat your test suite as a monolithic block. Use Tags or Labels (e.g., @smoke, @regression, @critical) to group your tests.
By labeling your most vital scripts as @critical, you can configure your testing tool to run only that subset during initial code pushes, keeping your workflow lean and fast.
3. Integrating Into Your CI/CD Workflow
To truly "test smarter," your priorities should be reflected in your automation pipeline (GitHub Actions, GitLab CI, etc.):
On Every Push: Trigger the Tier 1 (Critical) tests for immediate feedback.
Before Staging/Production: Run the Tier 2 (Important) suite to ensure overall stability.
Scheduled Runs: Execute Tier 3 (Supplemental) tests once a day or during low-traffic windows to save server resources.
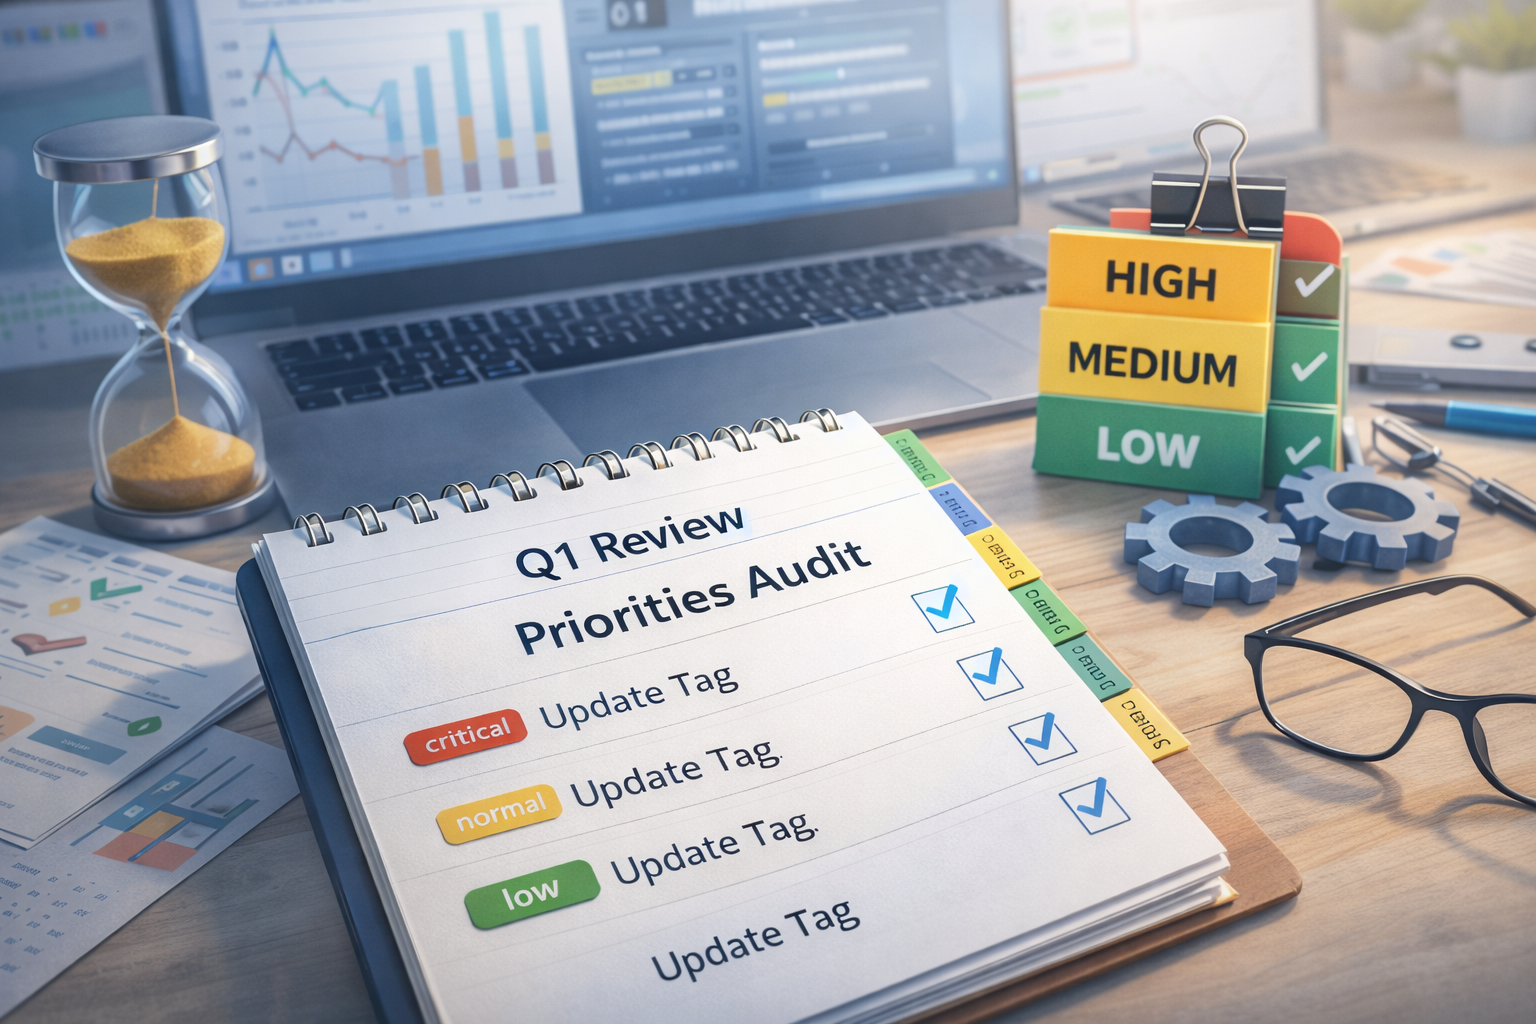
Pro-Tips for Long-Term Success
Audit Your Priorities: As your product evolves, what was "critical" last year might be "secondary" today. Review your tags quarterly.
Analyze Historical Data: If a specific feature breaks frequently, move its tests into a higher priority tier until the code stabilizes.
Parallelize: Once you’ve prioritized, run your high-priority tests in parallel to get results in seconds, not minutes.
Conclusion
Effective testing isn't about checking every box—it's about checking the right boxes at the right time. By mastering the art of prioritization, you’ll launch faster, reduce technical debt, and build a more resilient digital product.


