
Automated testing isn’t complete without touching the finer details of the digital experience, and file uploads are one of the most crucial. This step reveals whether a site smoothly handles user interactions or stumbles at the first simple challenge. It’s the moment of truth that puts the system under the microscope.
When I attach the file "file name" to "element"
This step defines the test for attaching files to the file input element, enabling their upload for use in a subsequent action.
A folder containing a set of test files (e.g., images, documents, etc.) should be placed under the tests/assets directory.
These files must be uploaded in advance with the appropriate file name. During the feature steps, the files are referenced and loaded into the file input element. In the subsequent step, the intended action is performed on the uploaded file.
For the proper configuration of the tests/assets folder path, see the Global Settings page.
Create a step that enables attaching a file to a field identified by its id|class|name|label.
Example:
When I attach the file "profileIcon.jpg" to "#profileIconUpload"
Real Testing Context
We will demonstrate automated functional acceptance testing using the attach step on a local Drupal CMS website, to verify the "Add Media Image" feature.
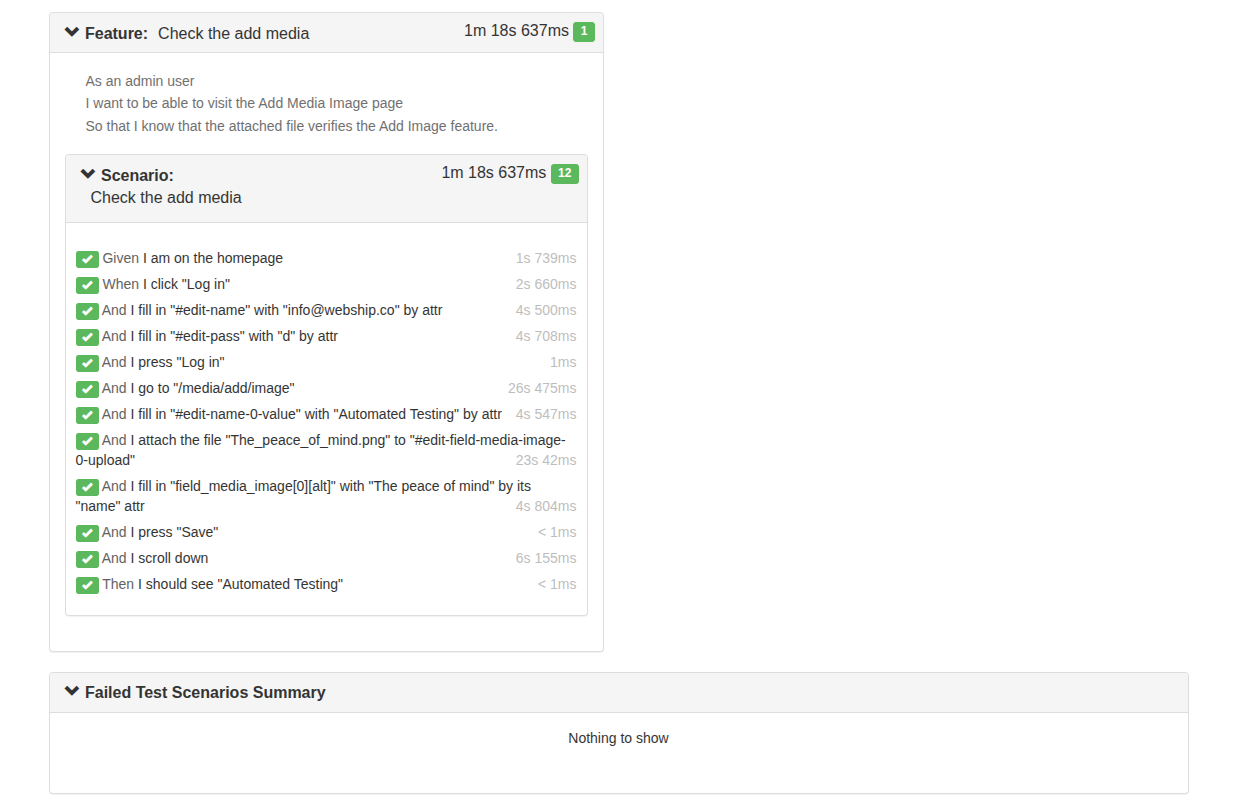
Feature: Check the add media
  As an admin user
  I want to be able to visit the Add Media Image page
  So that I know that the attached file verifies the Add Image feature.

  Scenario: Check the add media
    Given I am on the homepage
     When I click "Log in"
      And I fill in "#edit-name" with "info@webship.co" by attr
      And I fill in "#edit-pass" with "d" by attr
      And I press "Log in"
      And I go to "/media/add/image"
      And I fill in "#edit-name-0-value" with "Automated Testing" by attr
      And I attach the file "The_peace_of_mind.png" to "#edit-field-media-image-0-upload"
      And I fill in "field_media_image[0][alt]" with "The peace of mind" by its "name" attr
      And I press "Save"
      And I scroll down
     Then I should see "Automated Testing"
Watch the recorded video of the robot while running the automated functional testing feature
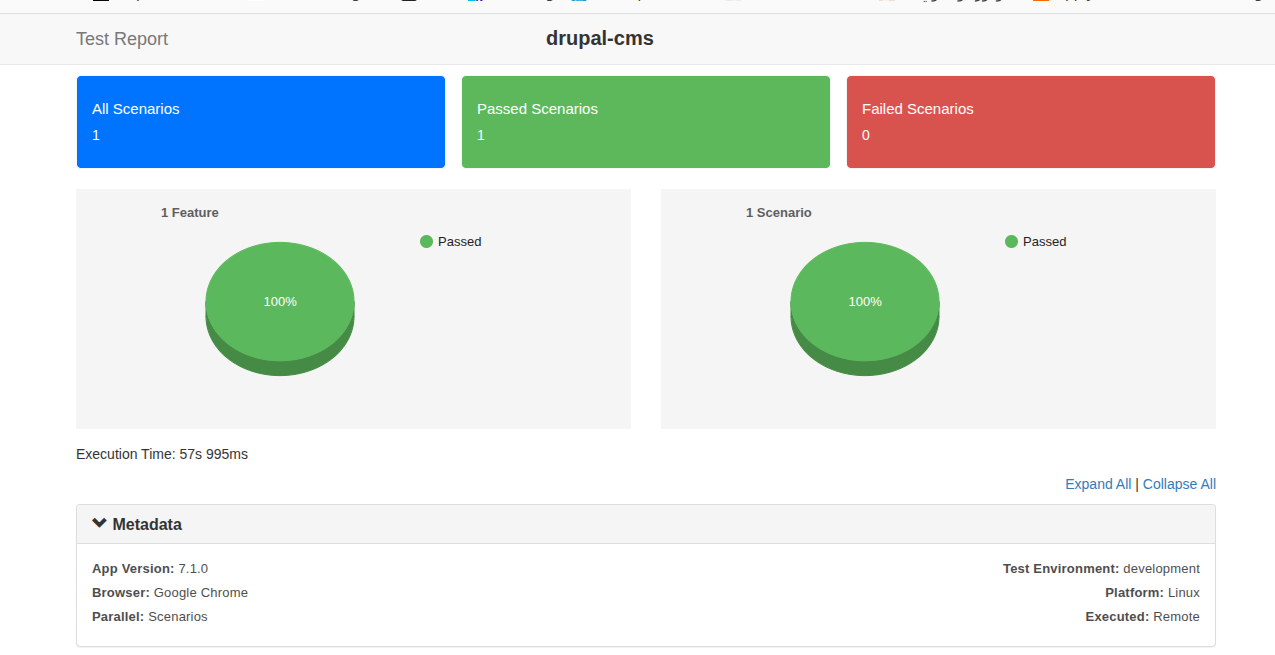
Display the results in the form of a report
You can see that all steps have been completed successfully
Conclusion
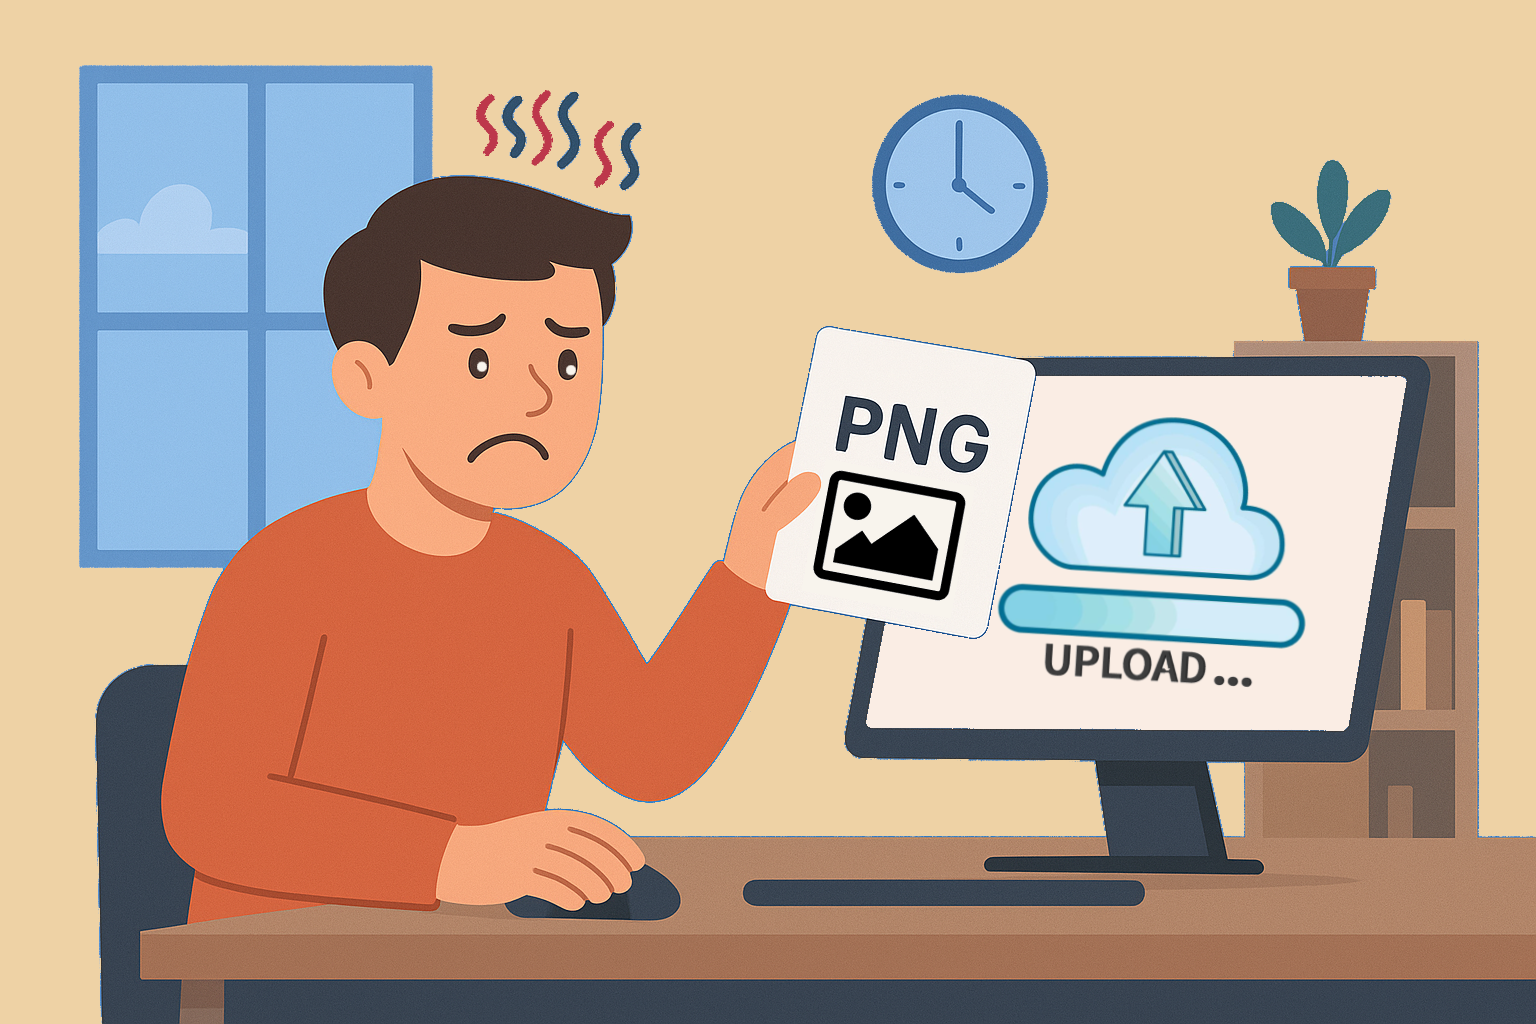
Adding this step means leaving no blind spots in the user journey. We upload the file in testing to make sure the user won’t end up uploading their stress later! 😅 Therefore, peace of mind feels much lighter when we know everything works as it should.
Learn more about Step Definitions in Webship-js
Visit the documentation site:- https://webship.co/docs


